Buffy the Butterfly
Beginner Friendly
Perfect for those just starting their crochet journey, with clear instructions and simple techniques
Single-Day Project
A satisfying project you can complete in a single afternoon or evening.
Handmade Gift
A beautiful keepsake — free forever. Read online or print at home.
 Magic ring & first rounds
 Building the shape
 Assembly in progress
 Finished & ready!
About This Buffy the Butterfly
Meet the Buffy The Butterfly
Butterflies are often regarded as symbols of transformation and beauty, and Buffy The Butterfly embodies these traits in a delightful amigurumi form. This enchanting creature captures the heart of anyone who encounters it, evoking feelings of joy and nostalgia. The intricate design and soft yarn create a cuddly companion that can brighten any room and bring a smile to your face.
What makes Buffy The Butterfly truly special is not just its aesthetic appeal, but the emotional connection it fosters. Children and adults alike love creating and gifting this little creature, making it a cherished keepsake for years to come. As an amigurumi, Buffy The Butterfly stands out with its unique wing patterns and vibrant colors, making it a rewarding project for crocheters of all skill levels.
Who Is This Buffy The Butterfly Pattern For?
The Buffy The Butterfly crochet pattern is perfect for beginners looking to dive into the world of amigurumi. With simple stitches and clear instructions, even those new to crocheting can successfully create this adorable butterfly. This pattern is also great for seasoned crocheters who want a quick and enjoyable project that yields satisfying results.
Buffy The Butterfly makes for a thoughtful gift on various occasions, such as baby showers, birthdays, or as a charming decoration for a nursery. Anyone who appreciates handcrafted items will treasure this delightful butterfly, making it an ideal present for friends and family alike.
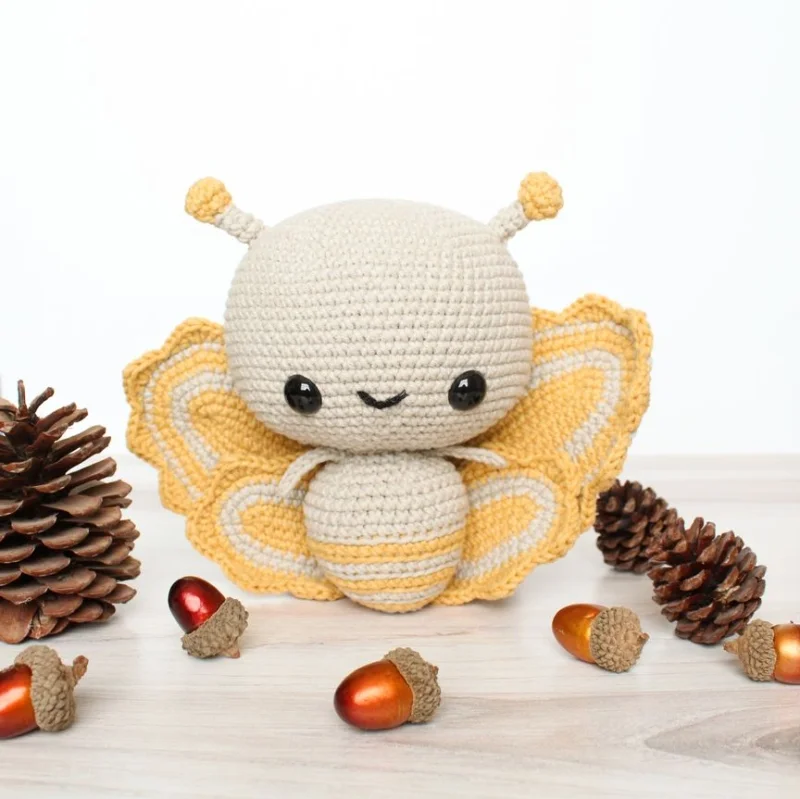
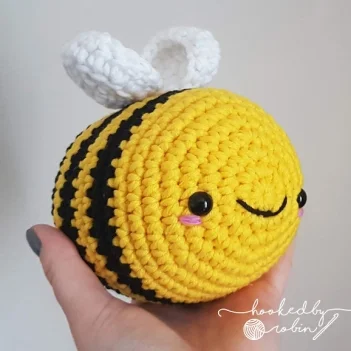
What Your Finished Buffy The Butterfly Will Look Like
When completed, your Buffy The Butterfly will stand approximately 15 cm tall, making it the perfect size for cuddling or displaying on a shelf. With its vibrant colors and soft textures, this amigurumi butterfly will surely become a focal point in any collection. The personality of Buffy shines through its charming smile and delicate wings, inviting admiration from anyone who sees it.
Display your finished Buffy The Butterfly in a child’s room, on a bookshelf, or as part of a whimsical centerpiece. Its cheerful demeanor and bright colors will easily uplift the atmosphere, capturing the hearts of all who encounter it.
Tips Before You Start Crocheting
Before diving into your Buffy The Butterfly amigurumi project, it’s essential to choose the right yarn. Opt for soft, durable yarn in bright colors that will bring your butterfly to life. Additionally, ensure you have the right hook size to maintain even tension throughout your work. Proper tension is crucial, especially in areas like the wings, where a consistent look is desired.
Preparation is key to a successful crocheting experience. Take the time to read through the entire pattern first, familiarize yourself with the construction, and gather all materials before starting. Common beginner mistakes, such as miscounting stitches or forgetting to stuff the wings, can be avoided with a little preparation and focus on each step.
More Free Patterns You Will Love
If you adore the Buffy The Butterfly amigurumi, you’ll be pleased to know that there are many other fantastic free crochet patterns available for you to explore. Check out the all free amigurumi crochet patterns section for more delightful creations that will inspire your next project.
Additionally, if you’re looking for something more advanced or unique, you can visit the premium amigurumi PDF patterns page for a variety of intricate designs. Each pattern is crafted with love, just like Buffy The Butterfly, and will surely bring joy to your crafting journey.
Starting rounds — magic ring and first increases
Why You'll Love This Pattern 💛
The Buffy The Butterfly pattern is special due to its clever construction, which allows for a seamless blend of form and functionality. The wings are designed to be both sturdy and flexible, making them perfect for display or play. This unique design choice ensures that your finished project not only looks great but also stands the test of time. The satisfaction of completing Buffy The Butterfly is unparalleled. As you watch the colorful wings take shape and the adorable body come together, a sense of accomplishment fills the air. Each stitch adds to the charm of your butterfly, and the end result is a delightful creation that you can proudly show off or gift to someone special. The joy of making Buffy The Butterfly lies in the process itself. As you work through the pattern, you’ll find yourself enchanted by the vibrant colors and playful design. This butterfly is not just a pattern; it’s an experience that fosters creativity and brings out the joy of crocheting in every stitch.
Shaping with increases — building the body
Switch Things Up 🎨
Customizing Buffy The Butterfly can be a fun adventure! Consider experimenting with color variations, such as using bright oranges and purples for a bold look or soft pastels for a more delicate appeal. You can also create seasonal versions of Buffy by choosing colors that reflect holidays or seasonal themes, like rich autumn hues or festive reds and greens for the winter. Another way to personalize your Buffy The Butterfly is by altering its size. By adjusting the yarn weight or hook size, you can create a smaller or larger version of your butterfly. This can be particularly fun if you want to make a set of Buffys in different sizes to showcase in a playful display. Adding special details can also elevate your Buffy The Butterfly. Consider embellishing the wings with glittery yarn or fabric to give them a sparkly effect, or sewing on little beads for added texture. Each customization choice allows you to express your creativity and make your Buffy truly unique.
Colour variations — personalise your make
Common Mistakes & How to Fix Them 🔧
Ensure the wings are evenly attached to avoid an unbalanced look.
Make sure the antennae are securely sewn to prevent them from drooping.
Plan your color changes in advance to maintain a consistent pattern.
Avoid overstuffing the wings, which can make them look bulky.
Use a strong stitch to attach the head to the body to prevent it from wobbling.
Always double-check your stitch count to avoid uneven shapes.

Assembly stage — pinning pieces before sewing
Materials Needed for Buffy the Butterfly
— Gauge:
18 sc = 4 inches
— Finished Size:
~15 cm tall
— Yarn Weight:
Worsted
— Hook:
3.5mm
— Terms:
US Crochet Terminology
— Cost:
FREE ✓
Crochet Abbreviations
Buffy the Butterfly — Full Pattern
🧶Pattern
Assembly & Finishing Tips
💡 Weaving in ends
Use a tapestry needle to weave each tail back and forth through at least 5–6 stitches in different directions. A tiny dot of washable glue on the final stitch before trimming adds extra security for toys used by children.
💡 Sewing pieces together
Pin each piece firmly to the body before sewing. Use mattress stitch for the most invisible join — insert the needle under the same yarn bar on alternating pieces and pull firmly. Knot securely at start and end, weave both tails deep into the body.
💡 Positioning safety eyes
Take time here — eye spacing determines the character's entire personality. Closer eyes look more intense; further apart looks more friendly and playful. Pin both positions and step back before snapping the backs on permanently. Once snapped, eyes cannot be moved without damaging the fabric.
💡 Blocking
Not required for amigurumi, but lightly steam-blocking any warped pieces will relax the fibres. Hold a steam iron a few centimetres away — never let it touch the stuffing or safety eyes directly.
💡 Care instructions
Handwash in cool water with mild detergent, press gently to remove excess water, lay flat to dry. Many acrylic yarns are machine washable on a gentle cycle in a laundry bag — always check your yarn label.
⚠️ Important Notes
- Use stitch markers at the start of every round — don't rely on memory to count.
- Work with consistent tension throughout. Gauge swatch before starting if in doubt.
- Fasten off leaving long tails for sewing — at least 30cm for each piece you'll need to attach.
- Pin and check positioning of all pieces before sewing any of them permanently.
Beginner's Guide to Amigurumi 🌱
Amigurumi (Japanese: ami = knitted/crocheted + nuigurumi = stuffed toy) is the craft of making small crocheted characters. You start with a magic ring, work in continuous spiral rounds of single crochet, and shape the piece through increases and decreases — no seams, no joins, no turning.
The magic ring creates a closable centre with no hole. Wrap yarn around two fingers, insert the hook, yarn over and pull through. Work your first round into this ring, then pull the tail to close tight. Practise a few times — it becomes effortless quickly.
The invisible decrease — insert your hook through the front loop only of the first stitch, then the front loop only of the second stitch. Yarn over, pull through both loops, then yarn over again and pull through the remaining two. Working through front loops only makes the decrease blend into the fabric instead of leaving a bump.
Tension matters most. Amigurumi needs tight, firm tension so stuffing can't show through. If you can see white fiberfill peeking between your stitches, go down one hook size. The fabric should feel dense and firm — like a tightly woven canvas, not a loose net.

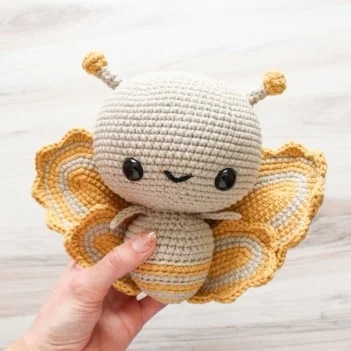
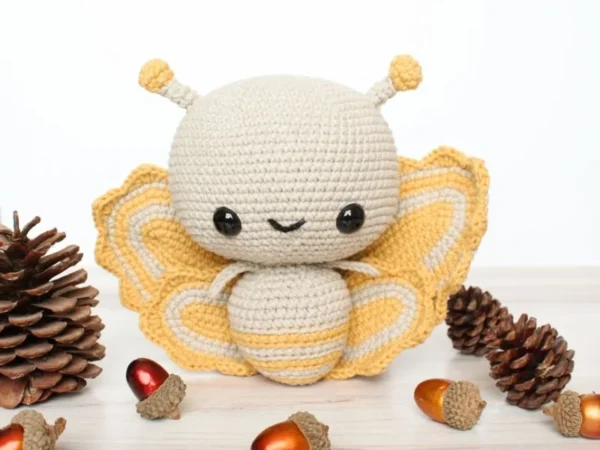
The finished Buffy the Butterfly — ready to gift or display
You Ask, We Answer ❓
Completely and permanently free — no login, no email, no payment, no hidden fees ever. Read online, print, save to your phone, share the link. The only ask: don't redistribute or resell the pattern itself.
Yes — you're welcome to sell handmade finished items crocheted from this pattern. Please credit Cozy Amigurumi as the pattern source when sharing online. You may not sell, redistribute, or claim authorship of the written pattern itself.
Invisible decrease: insert your hook through the front loop only of the first stitch, then the front loop only of the second stitch. Yarn over and pull through both front loops (2 loops on hook). Yarn over and pull through both loops. Creates a nearly invisible decrease — much neater than working through both loops.
Your hook is too large for your yarn, or your tension is too loose. Try going down one hook size. Amigurumi should have tight, firm tension — stuffing should never be visible. Some yarn brands run thicker or thinner than labelled, so switching without adjusting hook size can also cause this.
Cut the yarn leaving a 15cm tail. Thread onto a tapestry needle and insert through the front loop only of each remaining stitch around. Pull firmly to gather all stitches to the centre. Pass the needle through the gathered centre and out through the body, pull tight, then weave the tail in and trim.
Absolutely — any weight yarn with the matching hook size from the ball band. Lighter weight = smaller, more delicate result. Heavier weight = larger, chunkier version. Stitch counts stay exactly the same; only finished dimensions change.
With supervision, yes — basic stitches are manageable for crafty kids from around age 10. Young crocheters may need help with the magic ring and invisible decrease. Safety eyes must always be handled and secured by an adult due to choking hazard.
Pin all pieces with sewing pins before sewing anything. Check from front, back, and both sides for symmetry. Use the same yarn and a tapestry needle, working mattress stitch around each piece's edge. Pull firmly every few stitches and check the join is invisible from the front before knotting off.