Sunflower Sun-Mandala Table Runner
Advanced
For experienced crocheters who enjoy complex shaping, fine detail, and ambitious construction
Weekend Project
A satisfying weekend make — start Friday, finish Sunday, enjoy forever.
Handmade Gift
A beautiful keepsake — free forever. Read online or print at home.
About This Sunflower Sun-Mandala Table Runner
Bright as a field in August, this Sunflower Sun-Mandala Table Runner strings a row of radiant suns down the table. Each motif has a solid chocolate-brown centre, rings of golden-yellow and orange granny clusters, and a ring of pointed red flame petals that turn each circle into a blazing sun. Joined into a runner, they are impossible not to smile at.
Why you will love making this piece
Each sun is a complete little mandala, so you get the satisfaction of finishing a whole motif in an evening, then the fun of joining them into something bigger. The advanced skill is keeping multiple colour-change rings flat and clean and making the pointed flame petals crisp and even – plus joining round motifs into a straight, stable runner. It is colourful, fast-rewarding, and genuinely cheerful to work.
Choosing your colours and yarn
DK cotton keeps the granny clusters crisp and the flame points sharp, and the matte finish suits the sunflower theme. Use a true brown for the centre (not black) so it reads as a seed head, and let the yellows and oranges graduate outward so each sun has real glow. A slightly fluffy centre – a popcorn round – adds a lovely textured ‘seed’ look.
Keeping the colour rings flat
Each sun changes colour almost every round, which is where flatness can go wrong. Join each new colour in a chain space, keep your increase plan steady, and count clusters at the end of every ring. If a ring ruffles, you added a cluster too many; if it domes, you are short. Blocking each sun before joining makes the whole runner far easier.
Working the flame petals
The red flame points are the signature of this design. They are pointed petals worked around the last ring – keep them an even height and evenly spaced so the sun looks deliberate rather than spiky. Working them in a slightly firmer tension helps them hold their point without curling.
Joining into a runner
Round motifs need care to join into a straight line. Join them where they touch with a few firm stitches or short chain bridges, keeping the spacing even and the centres aligned. A row of three to five suns makes a classic runner; block the finished strip so it lies flat and the flames all point crisply.
A few ways to make it your own
Cool the palette to cream, sage and blue for a calmer ‘sunburst’ runner, or go full autumn with rust, gold and brown. Make a single sun as a hot-pad or centre mat, or a long chain of them as a table runner or even a scarf. Red flames at the edge make it a sun; green leaves instead make it a flower.
Starting rounds — magic ring and first increases
Why You'll Love This Pattern 💛
Each sun is a complete little mandala, so you get the satisfaction of finishing a whole motif in an evening, then the fun of joining them into something bigger. The advanced skill is keeping multiple colour-change rings flat and clean and making the pointed flame petals crisp and even - plus joining round motifs into a straight, stable runner. It is colourful, fast-rewarding, and genuinely cheerful to work.
Shaping with increases — building the body
Switch Things Up 🎨
Cool the palette to cream, sage and blue for a calmer 'sunburst' runner, or go full autumn with rust, gold and brown. Make a single sun as a hot-pad or centre mat, or a long chain of them as a table runner or even a scarf. Red flames at the edge make it a sun; green leaves instead make it a flower.
Colour variations — personalise your make
Common Mistakes & How to Fix Them 🔧
Too many petals or clusters - space the flames more widely and recount the ring below.
Work them a touch firmer and block them out on pins so they hold their point.
You are short on increases in one ring - add clusters until the motif lies flat.
Align the centres and keep the joining spacing identical between each pair of motifs.
Assembly stage — pinning pieces before sewing
Materials Needed for Sunflower Sun-Mandala Table Runner
🧶YARN
🪝TOOLS & NOTIONS
— Gauge:
one sun motif = ~25 cm
— Finished Size:
~95 x 26 cm (37 x 10 in)
— Yarn Weight:
DK Cotton
— Hook:
4.0mm
— Terms:
US Crochet Terminology
— Cost:
FREE ✓
Crochet Abbreviations
Sunflower Sun-Mandala Table Runner — Full Pattern
🧶SUN MOTIF (make 4-5)
🧶JOINING
Assembly & Finishing Tips
💡 Weaving in ends
Use a tapestry needle to weave each tail back and forth through at least 5–6 stitches in different directions. A tiny dot of washable glue on the final stitch before trimming adds extra security for toys used by children.
💡 Sewing pieces together
Pin each piece firmly to the body before sewing. Use mattress stitch for the most invisible join — insert the needle under the same yarn bar on alternating pieces and pull firmly. Knot securely at start and end, weave both tails deep into the body.
💡 Positioning safety eyes
Take time here — eye spacing determines the character's entire personality. Closer eyes look more intense; further apart looks more friendly and playful. Pin both positions and step back before snapping the backs on permanently. Once snapped, eyes cannot be moved without damaging the fabric.
💡 Blocking
Not required for amigurumi, but lightly steam-blocking any warped pieces will relax the fibres. Hold a steam iron a few centimetres away — never let it touch the stuffing or safety eyes directly.
💡 Care instructions
Handwash in cool water with mild detergent, press gently to remove excess water, lay flat to dry. Many acrylic yarns are machine washable on a gentle cycle in a laundry bag — always check your yarn label.
⚠️ Important Notes
- Use stitch markers at the start of every round — don't rely on memory to count.
- Work with consistent tension throughout. Gauge swatch before starting if in doubt.
- Fasten off leaving long tails for sewing — at least 30cm for each piece you'll need to attach.
- Pin and check positioning of all pieces before sewing any of them permanently.
Beginner's Guide to Amigurumi 🌱
Amigurumi (Japanese: ami = knitted/crocheted + nuigurumi = stuffed toy) is the craft of making small crocheted characters. You start with a magic ring, work in continuous spiral rounds of single crochet, and shape the piece through increases and decreases — no seams, no joins, no turning.
The magic ring creates a closable centre with no hole. Wrap yarn around two fingers, insert the hook, yarn over and pull through. Work your first round into this ring, then pull the tail to close tight. Practise a few times — it becomes effortless quickly.
The invisible decrease — insert your hook through the front loop only of the first stitch, then the front loop only of the second stitch. Yarn over, pull through both loops, then yarn over again and pull through the remaining two. Working through front loops only makes the decrease blend into the fabric instead of leaving a bump.
Tension matters most. Amigurumi needs tight, firm tension so stuffing can't show through. If you can see white fiberfill peeking between your stitches, go down one hook size. The fabric should feel dense and firm — like a tightly woven canvas, not a loose net.
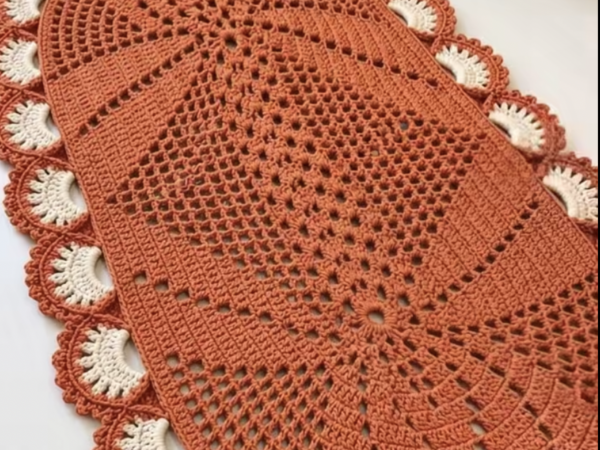
The finished Sunflower Sun-Mandala Table Runner — ready to gift or display
You Ask, We Answer ❓
Count clusters every round, join new colours in chain spaces, and keep your increase plan consistent. Block each sun before joining.
Absolutely - a single sun is a great hot-pad or centre mat. Add a hanging loop and it becomes a sunny wall piece.
Brown reads as a real sunflower seed head and warms the whole palette; black can look harsh against the yellows.
Yes - you may sell finished handmade pieces. Please credit Cozy Amigurumi as the designer; you may not resell or redistribute the pattern itself.