Finn the Sitting Dragon Amigurumi — Free Crochet Pattern
Advanced
For experienced crocheters who enjoy complex shaping, fine detail, and ambitious construction
Weekend Project
A satisfying weekend make — start Friday, finish Sunday, enjoy forever.
Handmade Gift
A beautiful keepsake — free forever. Read online or print at home.
About This Finn the Sitting Dragon Amigurumi — Free Crochet Pattern
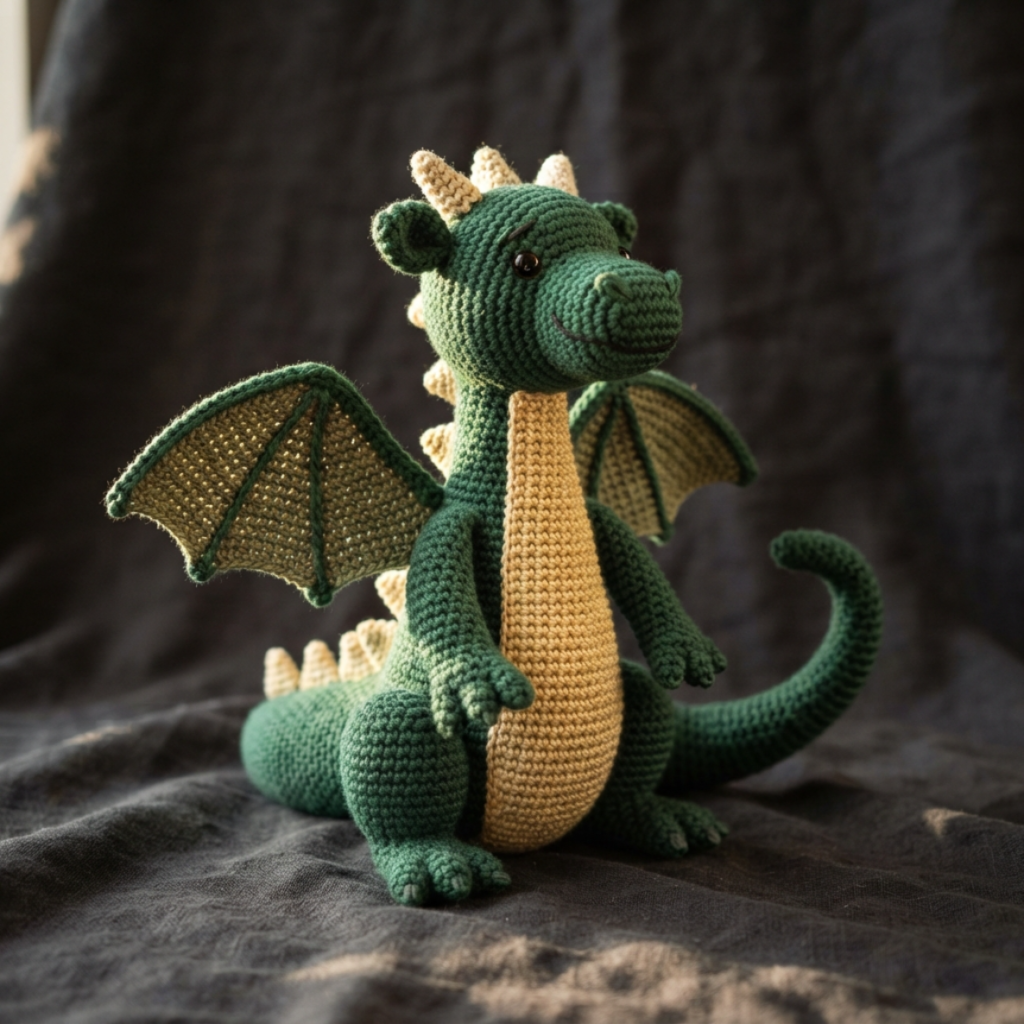
Finn is a sitting dragon amigurumi built from a rounded body and head, four clawed legs, a long segmented tail, a row of back spikes attached individually, and two wire-supported wings that can be posed. This is a genuinely multi-technique piece — surface crochet spikes, wire armature, and a longer assembly sequence than a typical beginner design.
This is an original design written from scratch for this site and has not yet been test-stitched — the stitch counts have been checked for consistency, but treat it as a draft until it has actually been made. Comfortable with magic ring, increases, decreases, and basic sewing before attempting this one.
Starting rounds — magic ring and first increases
Why You'll Love This Pattern 💛
This pattern brings together several techniques that usually only appear separately in simpler patterns — colour panels, individually-attached surface pieces, and wire armature — into one project, which makes it a genuinely satisfying build for anyone ready to move past straightforward single-piece animals. Posable wings mean every finished dragon can look slightly different depending on how you bend the wire, so no two finished Finns need to sit exactly the same way. The back-leg shaping (an increase round followed by a decrease round) gives noticeably sturdier haunches than a straight tube would, which is what actually lets the finished dragon sit upright unsupported rather than needing to be propped.
Shaping with increases — building the body
Switch Things Up 🎨
Work the whole dragon in jewel tones — purple body with silver-grey belly and spikes — for a more fantastical, less naturalistic look. Skip the wire in the wings if you would rather they lie flat and decorative rather than posable; the shaping stays identical either way. Add a small row of embroidered scale texture down the tail using chain-stitch embroidery in a slightly darker shade of the main colour.
Colour variations — personalise your make
Common Mistakes & How to Fix Them 🔧
Always bend wire ends back on themselves with pliers before inserting into the wing piece — an exposed wire tip can work through the stitches over time and become a real snag or safety hazard.
Because the spike row runs down a curved surface under some tension from the stuffing, each spike needs several genuine sewing stitches through its base, not just a couple of tacking stitches, or they will work loose.
The back legs include an increase round specifically to be thicker and support more weight — under-stuffing them relative to the front legs is a common reason a finished dragon will not balance in a sitting position.
Assembly stage — pinning pieces before sewing
Materials Needed for Finn the Sitting Dragon Amigurumi — Free Crochet Pattern
🧶YARN
DK weight, ~130g
~40g
small amount
🪝TOOLS & NOTIONS
long tail means easy to lose place)
(for wings)
(to bend wire ends safely)
— Gauge:
18 sc = 4 inches in sc
— Finished Size:
~20 cm tall (sitting), ~28 cm nose to tail tip
— Yarn Weight:
DK
— Hook:
3.25mm
— Terms:
US Crochet Terminology
— Cost:
FREE ✓
Crochet Abbreviations
Finn the Sitting Dragon Amigurumi — Free Crochet Pattern — Full Pattern
🧶HEAD
🧶SNOUT
🧶HORNS (Make 2, small)
🧶BODY
🧶FRONT LEGS (Make 2)
🧶BACK LEGS (Make 2, thicker)
🧶TAIL (long, tapering)
🧶SPIKES (Make 7, small, for the back)
🧶WINGS (Make 2, wire-supported)
🧶ASSEMBLY
Assembly & Finishing Tips
💡 Positioning the spike row
Mark the centre-back line with a length of scrap yarn basted loosely down the body before sewing any spikes, so the row stays straight rather than drifting to one side partway down.
💡 Posing the wings
Bend the wire gradually and check the pose from multiple angles rather than trying to get it perfect in one bend — wire work responds better to small repeated adjustments than one large one.
💡 Getting the dragon to sit unsupported
Attach and stuff both back legs firmly before attaching the tail, then test-balance the body alone first — the tail's weight and curl affects balance too, so it is easier to adjust the legs before the tail is in the way.
⚠️ Important Notes
- Use stitch markers at the start of every round — don't rely on memory to count.
- Work with consistent tension throughout. Gauge swatch before starting if in doubt.
- Fasten off leaving long tails for sewing — at least 30cm for each piece you'll need to attach.
- Pin and check positioning of all pieces before sewing any of them permanently.
Beginner's Guide to Amigurumi 🌱
Amigurumi (Japanese: ami = knitted/crocheted + nuigurumi = stuffed toy) is the craft of making small crocheted characters. You start with a magic ring, work in continuous spiral rounds of single crochet, and shape the piece through increases and decreases — no seams, no joins, no turning.
The magic ring creates a closable centre with no hole. Wrap yarn around two fingers, insert the hook, yarn over and pull through. Work your first round into this ring, then pull the tail to close tight. Practise a few times — it becomes effortless quickly.
The invisible decrease — insert your hook through the front loop only of the first stitch, then the front loop only of the second stitch. Yarn over, pull through both loops, then yarn over again and pull through the remaining two. Working through front loops only makes the decrease blend into the fabric instead of leaving a bump.
Tension matters most. Amigurumi needs tight, firm tension so stuffing can't show through. If you can see white fiberfill peeking between your stitches, go down one hook size. The fabric should feel dense and firm — like a tightly woven canvas, not a loose net.
The finished Finn the Sitting Dragon Amigurumi — Free Crochet Pattern — ready to gift or display
You Ask, We Answer ❓
Yes, completely free for personal use, gifts, or small-batch selling of the finished toy. Please do not repost or resell the written pattern itself.
Not yet — it is an original design with stitch counts checked for consistency, but it has not been crocheted yet. Treat it as a draft for now, especially given the added complexity of the wire and multi-piece assembly.
Millinery wire folded and capped inside a sewn fabric wing is generally considered low-risk for supervised play, but for a young child's toy, consider leaving the wire out entirely and working the wings as flat, unposed pieces instead.
A slightly smaller hook than the yarn label suggests keeps the surface tight enough to hide the wire and stuffing; a much larger hook will leave visible gaps, especially around the wing seams.