Quill the Hedgehog Amigurumi — Free Crochet Pattern
Intermediate
For crocheters comfortable with the basics, ready to try new shaping and assembly techniques
Single-Day Project
A satisfying project you can complete in a single afternoon or evening.
Handmade Gift
A beautiful keepsake — free forever. Read online or print at home.
About This Quill the Hedgehog Amigurumi — Free Crochet Pattern
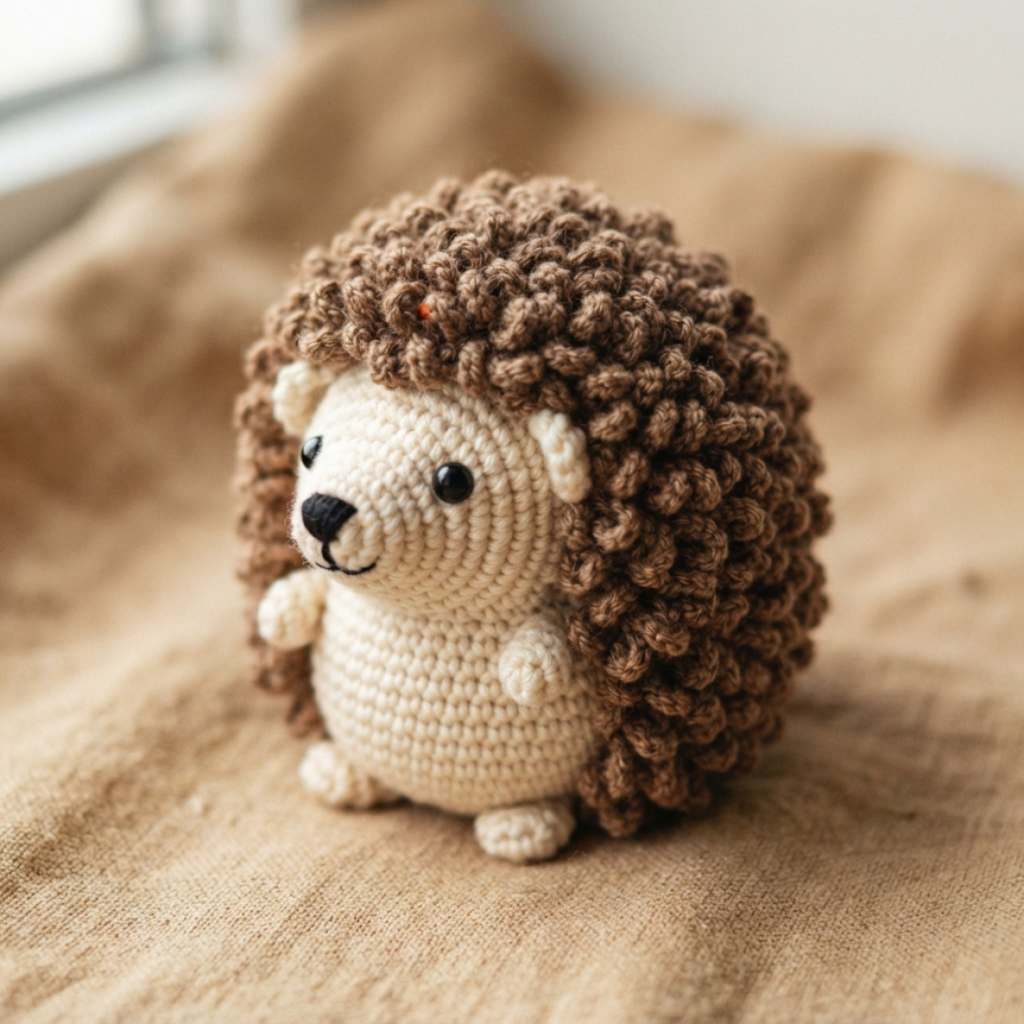
Quill is a hedgehog amigurumi with a domed, textured back worked in loop stitch to suggest spikes, and a smooth cream-coloured underside and face. The loop stitch texture is the only unusual technique here — everything else is standard single crochet shaping.
This is an original design written from scratch for this site and has not yet been test-stitched — the stitch counts have been checked for consistency, but treat it as a draft until it has actually been made.
Starting rounds — magic ring and first increases
Why You'll Love This Pattern 💛
Loop stitch is the one technique this pattern introduces beyond basic shaping, and it is used consistently across five straightforward rounds — enough to properly practice it without it dominating the whole project. Building the hedgehog from two joined domed pieces (spiky back, smooth face/belly) rather than one continuous body makes the two-tone colour split completely clean, with no colour-carrying or tricky round-by-round switching needed. The finished texture genuinely looks and feels different from almost every other amigurumi animal, which makes this a good project once smooth single crochet shaping feels routine and you want to try something with more surface interest.
Shaping with increases — building the body
Switch Things Up 🎨
Leave the loop stitch loops uncut for a shaggier, more exaggerated spiky look, or trim them short and even for a neater, more brushed texture. Work the back in two shades of brown, switching partway through, for a more naturalistic gradient effect. Add a tiny crocheted apple or leaf between the front feet for the hedgehog to "hold."
Colour variations — personalise your make
Common Mistakes & How to Fix Them 🔧
Loops that are wrapped too loosely around your finger will pull out easily once trimmed — keep a consistent, snug wrap for a texture that holds up over time.
The back has 18 stitches at its final round and the face/belly also finishes at a matching count — count both before joining and ease any small mismatch evenly around the seam rather than bunching it in one spot.
Untrimmed loop stitch can look messy if the loops vary a lot in length — even a rough, consistent trim across the whole back improves the finished look significantly.
Assembly stage — pinning pieces before sewing
Materials Needed for Quill the Hedgehog Amigurumi — Free Crochet Pattern
🧶YARN
Worsted weight, ~70g
~40g
small amount for nose
🪝TOOLS & NOTIONS
— Gauge:
18 sc = 4 inches in sc
— Finished Size:
~10 cm tall
— Yarn Weight:
Worsted
— Hook:
3.5mm
— Terms:
US Crochet Terminology
— Cost:
FREE ✓
Crochet Abbreviations
Quill the Hedgehog Amigurumi — Free Crochet Pattern — Full Pattern
🧶BACK (worked in loop stitch from R4 onward)
🧶FACE & BELLY (worked in cream, joins to back)
🧶FEET (Make 4, cream)
🧶ASSEMBLY
Assembly & Finishing Tips
💡 Working loop stitch consistently
Wrap the yarn around your index finger to the same depth every single stitch — inconsistent loop length is the most common reason a finished loop-stitch texture looks patchy rather than even.
💡 Joining the back and belly pieces
Pin the two pieces together at four evenly spaced points first, matching the seams like a compass, before sewing the whole way around — this keeps the dome shapes aligned rather than twisting.
⚠️ Important Notes
- Use stitch markers at the start of every round — don't rely on memory to count.
- Work with consistent tension throughout. Gauge swatch before starting if in doubt.
- Fasten off leaving long tails for sewing — at least 30cm for each piece you'll need to attach.
- Pin and check positioning of all pieces before sewing any of them permanently.
Beginner's Guide to Amigurumi 🌱
Amigurumi (Japanese: ami = knitted/crocheted + nuigurumi = stuffed toy) is the craft of making small crocheted characters. You start with a magic ring, work in continuous spiral rounds of single crochet, and shape the piece through increases and decreases — no seams, no joins, no turning.
The magic ring creates a closable centre with no hole. Wrap yarn around two fingers, insert the hook, yarn over and pull through. Work your first round into this ring, then pull the tail to close tight. Practise a few times — it becomes effortless quickly.
The invisible decrease — insert your hook through the front loop only of the first stitch, then the front loop only of the second stitch. Yarn over, pull through both loops, then yarn over again and pull through the remaining two. Working through front loops only makes the decrease blend into the fabric instead of leaving a bump.
Tension matters most. Amigurumi needs tight, firm tension so stuffing can't show through. If you can see white fiberfill peeking between your stitches, go down one hook size. The fabric should feel dense and firm — like a tightly woven canvas, not a loose net.
The finished Quill the Hedgehog Amigurumi — Free Crochet Pattern — ready to gift or display
You Ask, We Answer ❓
Yes, completely free for personal use, gifts, or small-batch selling of the finished toy. Please do not repost or resell the written pattern itself.
Not yet — it is an original design with stitch counts checked for consistency, but it has not been crocheted yet. Treat it as a draft for now.
It is a simple variation on single crochet — instead of just pulling up a loop, you wrap the yarn around a finger (or a ruler) first to leave a loop on the front, then complete the stitch as normal. A quick search for "crochet loop stitch tutorial" will show the motion clearly if you have not tried it before.