Milo the Fox Amigurumi — Free Crochet Pattern
Intermediate
For crocheters comfortable with the basics, ready to try new shaping and assembly techniques
Weekend Project
A satisfying weekend make — start Friday, finish Sunday, enjoy forever.
Handmade Gift
A beautiful keepsake — free forever. Read online or print at home.
About This Milo the Fox Amigurumi — Free Crochet Pattern
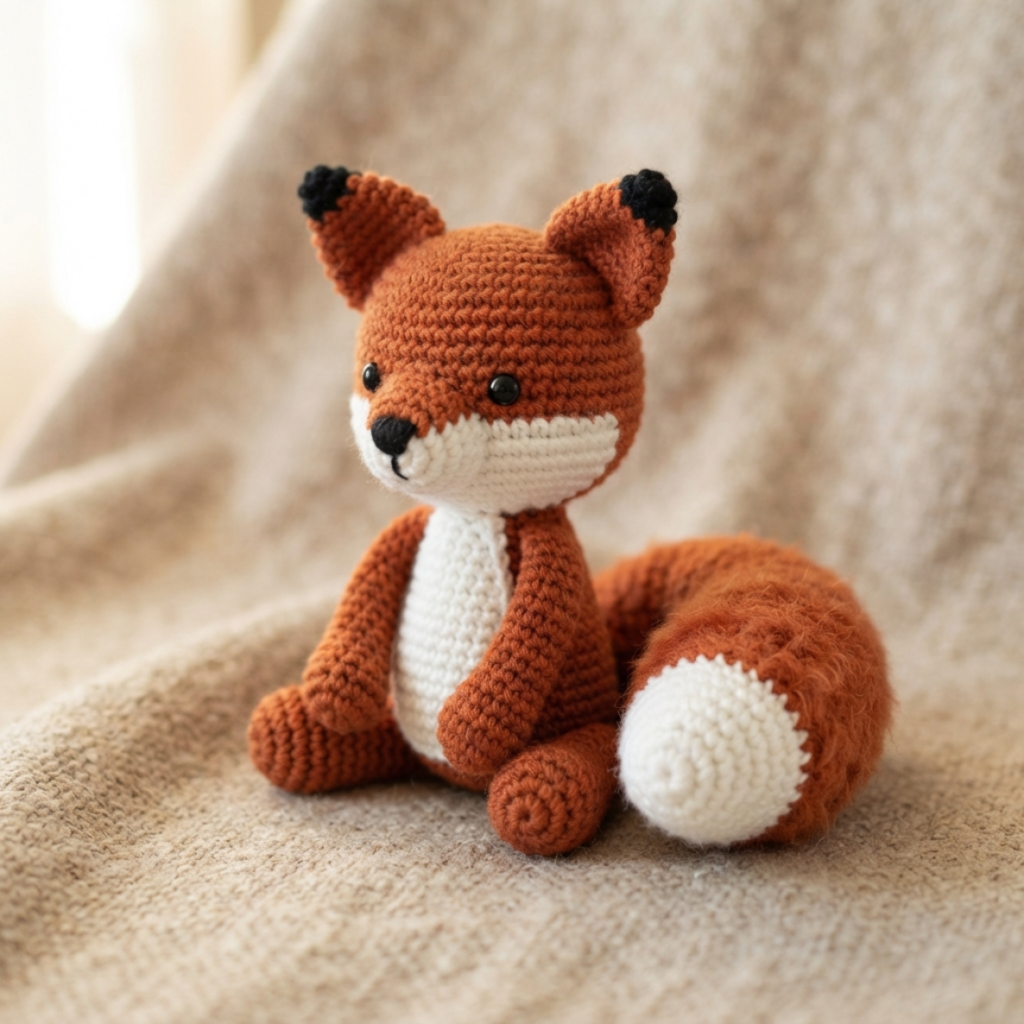
Milo is a fox amigurumi built with a slightly narrower body than a typical round design, pointed ears, and an oversized tail that is worked longer than the body itself — the signature fox silhouette. Two colours (a main orange/rust and a white underbelly) are used throughout.
This is an original design written from scratch for this site and has not yet been test-stitched by a human — the stitch math has been checked for consistency, but treat it as a draft until someone has actually made one.
Starting rounds — magic ring and first increases
Why You'll Love This Pattern 💛
The colour-switching in this pattern is kept simple — you are never juggling more than two colours in a single round, so it is a gentle introduction to working with contrast yarn without the complexity of a full colourwork chart. A fox's tail worked almost as long as its body is a distinctive, recognisable silhouette, which means this pattern reads clearly as "fox" the moment it is assembled, even before the face details go on. The BLO round on the body creates a subtle ridge that suggests where the underbelly colour change happens, giving a more finished look without any extra embroidery.
Shaping with increases — building the body
Switch Things Up 🎨
Swap rust orange for grey to make an arctic fox version, or try a rich red-brown for a more realistic red fox colouring. Work the tail tip in black instead of white for a silver-fox style variation. Add a small crocheted or felt bandana around the neck in a bright contrast colour for extra personality.
Colour variations — personalise your make
Common Mistakes & How to Fix Them 🔧
Change colour on the last yarn-over of the final stitch of the previous round, not partway through the new round, so the colour change lines up cleanly at the start of the round.
The tail is worked long and only lightly stuffed on purpose for a fluffy look, but it needs a firm sew-on point at the base — anchor it with several extra stitches into the body, not just a couple.
Fox ears read as far more alert and fox-like when spaced a bit wider than you might expect — check the finished look from the front before committing to the final stitches.
Assembly stage — pinning pieces before sewing
Materials Needed for Milo the Fox Amigurumi — Free Crochet Pattern
🧶YARN
Worsted weight, ~100g
~30g for underbelly, ear linings, and tail tip
small amount for nose and ear tips
🪝TOOLS & NOTIONS
— Gauge:
18 sc = 4 inches in sc
— Finished Size:
~18 cm tall (including tail)
— Yarn Weight:
Worsted
— Hook:
3.5mm
— Terms:
US Crochet Terminology
— Cost:
FREE ✓
Crochet Abbreviations
Milo the Fox Amigurumi — Free Crochet Pattern — Full Pattern
🧶HEAD
🧶EARS (Make 2)
🧶BODY
🧶LEGS (Make 4)
🧶TAIL
🧶ASSEMBLY
Assembly & Finishing Tips
💡 Managing colour changes
Carry the unused colour loosely up the inside of the work if you will need it again within a few rounds, rather than cutting and rejoining each time — it saves ends to weave in later.
💡 Getting the snout shape right
The decrease rounds on the head naturally taper into a snout shape on their own — resist the urge to add extra decreases, as it will make the snout too pointed and less fox-like.
⚠️ Important Notes
- Use stitch markers at the start of every round — don't rely on memory to count.
- Work with consistent tension throughout. Gauge swatch before starting if in doubt.
- Fasten off leaving long tails for sewing — at least 30cm for each piece you'll need to attach.
- Pin and check positioning of all pieces before sewing any of them permanently.
Beginner's Guide to Amigurumi 🌱
Amigurumi (Japanese: ami = knitted/crocheted + nuigurumi = stuffed toy) is the craft of making small crocheted characters. You start with a magic ring, work in continuous spiral rounds of single crochet, and shape the piece through increases and decreases — no seams, no joins, no turning.
The magic ring creates a closable centre with no hole. Wrap yarn around two fingers, insert the hook, yarn over and pull through. Work your first round into this ring, then pull the tail to close tight. Practise a few times — it becomes effortless quickly.
The invisible decrease — insert your hook through the front loop only of the first stitch, then the front loop only of the second stitch. Yarn over, pull through both loops, then yarn over again and pull through the remaining two. Working through front loops only makes the decrease blend into the fabric instead of leaving a bump.
Tension matters most. Amigurumi needs tight, firm tension so stuffing can't show through. If you can see white fiberfill peeking between your stitches, go down one hook size. The fabric should feel dense and firm — like a tightly woven canvas, not a loose net.
The finished Milo the Fox Amigurumi — Free Crochet Pattern — ready to gift or display
You Ask, We Answer ❓
Yes, completely free for personal use, gifts, or small-batch selling of the finished toy. Please do not repost or resell the written pattern itself.
Not yet — it is an original design with stitch counts checked for internal consistency, but no one has crocheted this exact write-up. Treat it as a draft until it has been made and confirmed.
Yes — the shaping will look identical, you will just lose the two-tone fox markings. It is a good option if you are still building confidence with changing colours mid-round.