Ribbit the Frog Amigurumi — Free Crochet Pattern
Intermediate
For crocheters comfortable with the basics, ready to try new shaping and assembly techniques
Single-Day Project
A satisfying project you can complete in a single afternoon or evening.
Handmade Gift
A beautiful keepsake — free forever. Read online or print at home.
About This Ribbit the Frog Amigurumi — Free Crochet Pattern
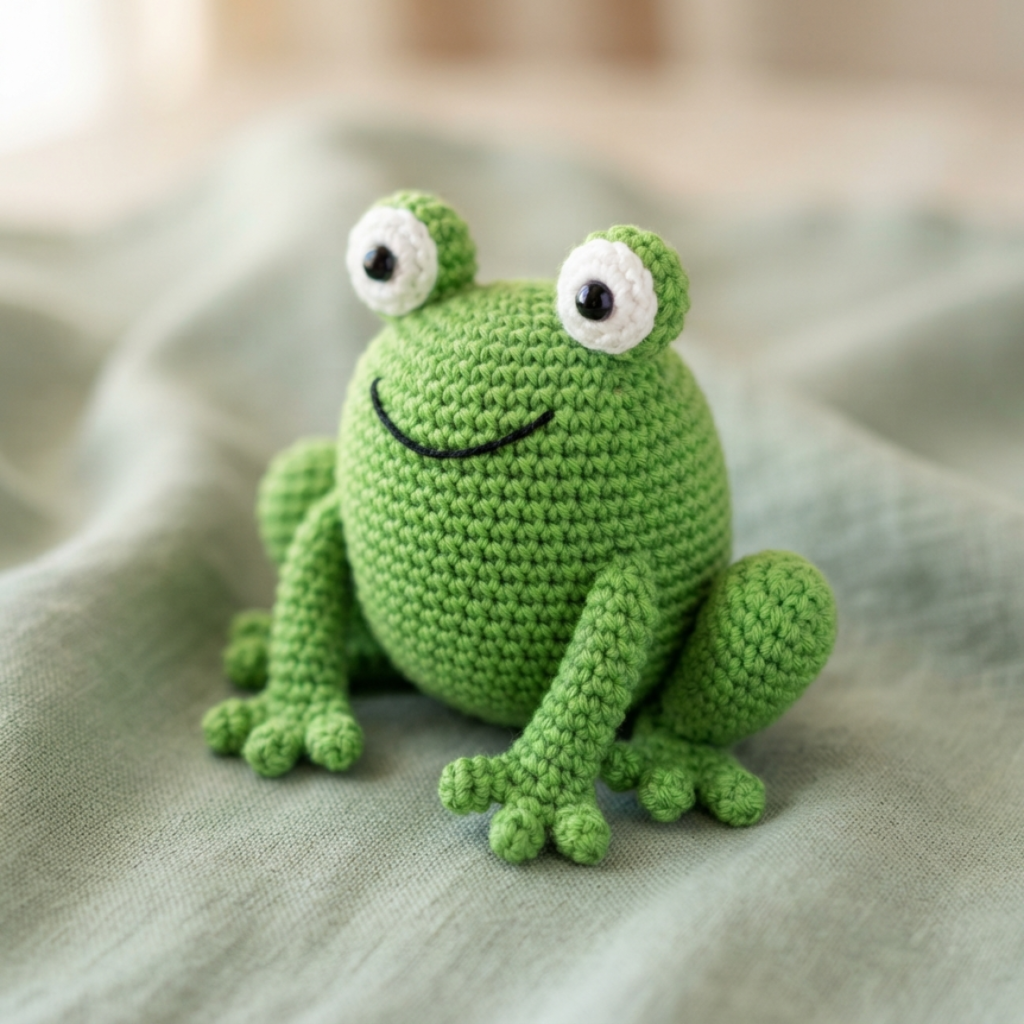
Ribbit is a frog amigurumi with a wide, slightly flattened body, two oversized eye stalks, and long back legs that fold to look like a frog mid-crouch. The front legs are short and simple, while the back legs are worked longer with a bend built into the assembly.
This is an original design written from scratch for this site and has not yet been test-stitched — the stitch counts have been checked for consistency, but treat it as a draft until it has actually been made.
Starting rounds — magic ring and first increases
Why You'll Love This Pattern 💛
This is one of very few common amigurumi animals with no safety eyes at all — the whole face is built from crocheted eye-stalk pieces, which is a nice change of technique from the usual safety-eye placement steps. The back legs' fold-and-sew assembly step is a simple way to get dynamic, bent-looking limbs without any complicated shaping in the crochet itself — all the personality comes from how you sew it, not extra rounds. A wide, flattened body shape is genuinely different from the sphere-based bodies most amigurumi animals share, which makes this a good project once you want to branch out from the standard round shape.
Shaping with increases — building the body
Switch Things Up 🎨
Work the body in a bright pink or blue for a more whimsical, non-realistic frog. Add small crocheted lily-pad shapes as a display base using green and a simple flat spiral. Embroider small dark spots across the back for a poison-dart-frog style pattern.
Colour variations — personalise your make
Common Mistakes & How to Fix Them 🔧
Frog eyes read as much more frog-like when placed close together near the top-front of the head, almost touching — check placement before committing to final stitches.
Sewing the back legs on straight rather than folded removes the crouched, ready-to-jump look that makes this design recognisable as a frog rather than a generic four-legged animal.
The body benefits from a slightly flattened, wide stuffing rather than a perfectly round one — stuff firmly but gently press the sides in slightly as you finish for a more frog-like silhouette.
Assembly stage — pinning pieces before sewing
Materials Needed for Ribbit the Frog Amigurumi — Free Crochet Pattern
🧶YARN
Worsted weight, ~80g
small amount for eyes
small amount for pupils
🪝TOOLS & NOTIONS
— Gauge:
18 sc = 4 inches in sc
— Finished Size:
~11 cm tall, ~15 cm long (legs extended)
— Yarn Weight:
Worsted
— Hook:
3.5mm
— Terms:
US Crochet Terminology
— Cost:
FREE ✓
Crochet Abbreviations
Ribbit the Frog Amigurumi — Free Crochet Pattern — Full Pattern
🧶BODY
🧶EYES (Make 2, in white)
🧶FRONT LEGS (Make 2)
🧶BACK LEGS (Make 2, longer)
🧶ASSEMBLY
Assembly & Finishing Tips
💡 Folding the back legs
Fold each back leg so the increase round sits at the outside of the bend (like a knee), then sew through several stitches at that fold point to the body so the joint holds its angle rather than flopping straight.
💡 Positioning the eyes symmetrically
Pin both eyes in place and check from directly above the head, not just from the front, since frog eyes sit on top of the head as much as on the front.
⚠️ Important Notes
- Use stitch markers at the start of every round — don't rely on memory to count.
- Work with consistent tension throughout. Gauge swatch before starting if in doubt.
- Fasten off leaving long tails for sewing — at least 30cm for each piece you'll need to attach.
- Pin and check positioning of all pieces before sewing any of them permanently.
Beginner's Guide to Amigurumi 🌱
Amigurumi (Japanese: ami = knitted/crocheted + nuigurumi = stuffed toy) is the craft of making small crocheted characters. You start with a magic ring, work in continuous spiral rounds of single crochet, and shape the piece through increases and decreases — no seams, no joins, no turning.
The magic ring creates a closable centre with no hole. Wrap yarn around two fingers, insert the hook, yarn over and pull through. Work your first round into this ring, then pull the tail to close tight. Practise a few times — it becomes effortless quickly.
The invisible decrease — insert your hook through the front loop only of the first stitch, then the front loop only of the second stitch. Yarn over, pull through both loops, then yarn over again and pull through the remaining two. Working through front loops only makes the decrease blend into the fabric instead of leaving a bump.
Tension matters most. Amigurumi needs tight, firm tension so stuffing can't show through. If you can see white fiberfill peeking between your stitches, go down one hook size. The fabric should feel dense and firm — like a tightly woven canvas, not a loose net.
The finished Ribbit the Frog Amigurumi — Free Crochet Pattern — ready to gift or display
You Ask, We Answer ❓
Yes, completely free for personal use, gifts, or small-batch selling of the finished toy. Please do not repost or resell the written pattern itself.
Not yet — it is an original design with stitch counts checked for consistency, but it has not been crocheted yet. Treat it as a draft for now.
Yes — you can skip the eye pieces entirely and use safety eyes placed near the top-front of the head instead; the rest of the pattern stays the same either way.