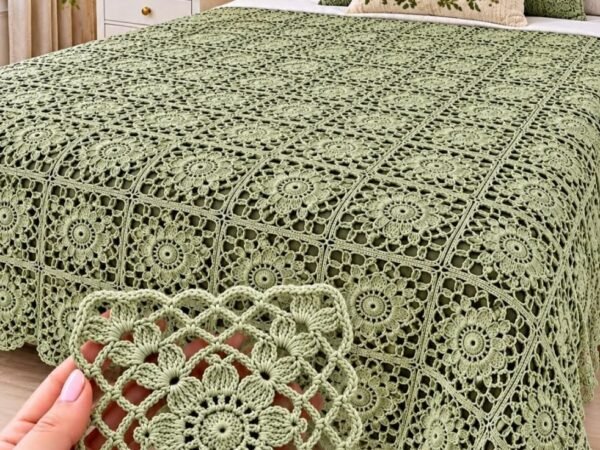
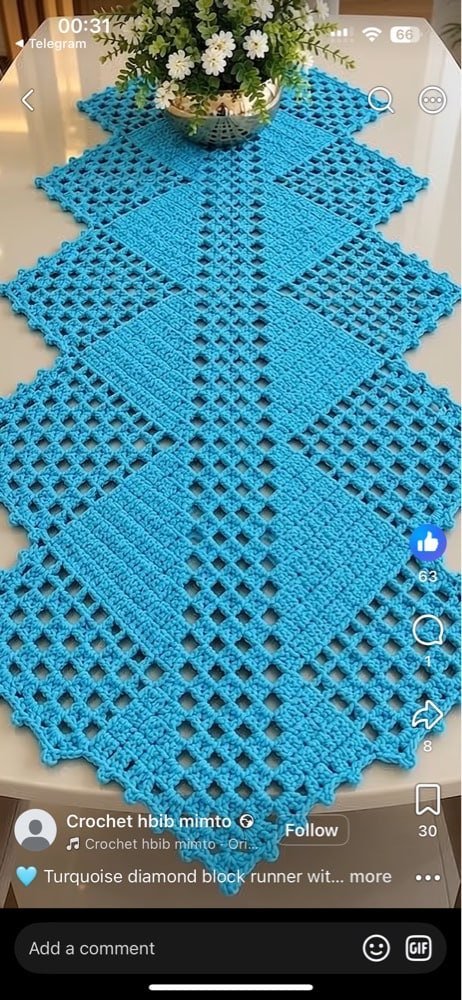
Turquoise Diamond Block Crochet Table Runner — Free Crochet Pattern
Intermediate
For crocheters comfortable with the basics, ready to try new shaping and assembly techniques
Weekend Project
A satisfying weekend make — start Friday, finish Sunday, enjoy forever.
Handmade Gift
A beautiful keepsake — free forever. Read online or print at home.
About This Turquoise Diamond Block Crochet Table Runner — Free Crochet Pattern
Welcome to the ultimate guide for creating a stunning turquoise diamond block crochet table runner free pattern that transforms any dining space into a work of art. This sophisticated home decor piece marries classic geometric precision with rich, ocean-inspired hues, creating a mesmerizing focal point for both everyday dining and formal gatherings. Crafted with meticulous attention to detail, the design features interlocking diamond blocks that play with positive and negative space, producing a crisp, modern aesthetic built on traditional crochet foundations.
The visual appeal of this runner lies in its striking color palette, anchored by vibrant turquoise and balanced with crisp white and subtle silver gray accents. Each individual diamond motif is constructed from the center outward, utilizing precise increases and post stitches to establish a pronounced three-dimensional relief. When joined together, these motifs create a continuous geometric rhythm that draws the eye across the entire length of the table, offering texture, structure, and undeniable elegance.
Engineered specifically for the intermediate to advanced crocheter, this pattern offers a rewarding challenge that elevates standard motif-based projects. Rather than relying on simple flat squares, this design employs advanced stitch manipulation, seamless join-as-you-go concepts or clean whipstitch assembly options, and an integrated border structure that frames the intricate geometric field. Every round is mathematically balanced to ensure flat, flawless blocking without warping or puckering.
Whether you are looking to elevate your dining room decor, create a bespoke handmade gift for a wedding or housewarming, or simply expand your repertoire of advanced crochet techniques, this project delivers exceptional results. The comprehensive instructions provided here guide you through every single round, stitch count, and assembly phase with absolute clarity, leaving no room for ambiguity or guesswork.
Prepare your yarn stash, select your favorite ergonomic hook, and dive into a rewarding journey of thread and fiber. By the time you weave in your final end and block your finished masterpiece, you will possess a heirloom-quality table runner that showcases your technical mastery and elevates your home interior design to professional heights.
At a Glance
- Skill level: Intermediate
- Time: 4 to 6 weeks (approx. 35-45 hours total work time)
- Finished size: 140 cm long by 40 cm wide (55 in x 15.7 in)
- Yarn: DK weight 100% mercerized cotton, approx. 1,600 meters (1,750 yards) total
- Hook: 3.5 mm (US E/4)
- Main technique: Modular geometric motif construction, post stitches, and seamless assembly
- Number of motifs/rows: 14 main diamond blocks, 28 half-diamond edge fillers, and a 4-round structural border
- Best for: Dining tables, console displays, housewarming gifts, and heirloom decor
Why You’ll Love This Pattern
- Exquisite geometric detail: The interlocking diamond motif creates a breathtaking optical rhythm that looks professionally crafted and high-end.
- Zero guesswork stitch counts: Every single round includes exact, pre-calculated stitch counts to ensure your motifs maintain perfect symmetry and flat tension.
- Versatile aesthetic: The brilliant turquoise and crisp white colorway complements both modern minimalist interiors and classic bohemian dining settings.
- Modular satisfaction: Working in manageable individual motifs makes this a wonderful portable project that you can take anywhere before final assembly.
- Advanced skill building: Sharpen your command over front post stitches, diagonal increases, and clean blocking techniques with expert-level guidance.
- Heirloom durability: Crafted using mercerized cotton, this runner is designed to withstand daily use while maintaining its crisp stitch definition and vibrant sheen.
Materials
- Color A, Vibrant Turquoise: About 700 m (765 yd) of DK weight 100% mercerized cottonUsed for motif core sections and central diamond highlights.
- Color B, Crisp White: About 600 m (655 yd) of DK weight 100% mercerized cottonUsed for background frames and secondary motif layers.
- Color C, Silver Gray: About 300 m (330 yd) of DK weight 100% mercerized cottonUsed for final motif bounding rounds and structural joining.
- Main Hook: 3.5 mm (US E/4) ergonomic crochet hookRequired to maintain consistent gauge and stitch firmness.
- Secondary Hook: 3.25 mm (US D/3) crochet hookOptional, used specifically for working tight foundation loops or border setup if needed.
- Tapestry Needle: Large-eye blunt tip tapestry needleEssential for weaving in ends securely across cotton fibers.
- Stitch Markers: 10 locking stitch markersUsed to hold motifs in place during alignment and assembly phases.
- Scissors: Precision embroidery scissorsFor clean yarn clipping.
- Measuring Tape: Flexible soft measuring tapeFor checking motif dimensions and overall runner length.
- Blocking Supplies: Foam blocking mats, rust-proof T-pins, and a steam iron or spray bottleCrucial for achieving crisp, professional geometric angles on cotton blocks.
Abbreviations
chchainsl stslip stitchscsingle crochet (UK double crochet)hdchalf double crochet (UK half treble crochet)dcdouble crochet (UK treble crochet)trtreble crochet (UK double treble crochet)fptrfront post treble crochetfpdcfront post double crochetbpdcback post double crochetbloback loop onlyflofront loop onlyyoyarn overststitchstsstitchesspspacespsspacesbegbeginningreprepeatrndroundaltalternateRSright sideWSwrong sideMCmain color (Color A)CC1contrasting color 1 (Color B)CC2contrasting color 2 (Color C)Special Stitches
Front Post Treble Crochet (fptr): Yo twice, insert hook from front to back to front around the post of the indicated stitch 2 rows below, yo, pull up a loop, [yo, pull through 2 loops] 3 times. Used to create raised diagonal ribs in Rounds 4 through 7.
- Step 1: Yarn over twice and hold tension steady with your working finger.
- Step 2: Insert your hook from the front side of the work, moving behind the vertical post of the target stitch down to the front again, bypassing the top loops entirely.
- Step 3: Yarn over and pull up a long loop, matching the height of the current working row.
- Step 4: [Yarn over and pull through 2 loops on hook] repeat 3 times until 1 loop remains on the hook.
Cluster Stitch (3-dc cl): [Yo, insert hook in specified st/sp, yo, pull up loop, yo, pull through 2 loops] 3 times in the same st/sp, yo, pull through all 4 loops on hook. Used in floral motif corners to create textured petals.
- Step 1: Yarn over, insert hook into the designated stitch or chain space, yarn over, and pull up a loop to working height (3 loops on hook).
- Step 2: Yarn over and pull through the first 2 loops on your hook (2 loops remaining).
- Step 3: Repeat Steps 1 and 2 two more times into the exact same stitch or space (4 loops on hook).
- Step 4: Yarn over and pull through all 4 loops simultaneously to close the cluster.
Understanding the Construction
The turquoise diamond block crochet table runner free pattern is engineered using an advanced modular motif architecture. Instead of working flat rows from end to end, which can lead to uneven tension and skewed edges in cotton yarn, this project is built from individual hexagonal-diamond hybrid motifs that tessellate seamlessly. Each motif begins at the central focal point in Color A, expands outward through symmetrical diamond shaping in Color B, and is squared off with a robust boundary frame in Color C. This staged construction ensures that each geometric unit achieves maximum stability before assembly.
Tension control is the single most critical engineering factor in this design. Mercerized cotton has virtually no natural elasticity compared to wool or acrylic, meaning that inconsistent pull on your stitches will immediately show up as warped diamond angles during blocking. Working with a slightly smaller hook size (3.5 mm) than recommended for DK yarn forces the stitches to pack tightly together, locking the geometric facets into crisp, clean lines that hold their shape under regular use.
The final layout arranges 14 primary diamond blocks in a staggered linear chain, flanked by 28 half-diamond edge fillers that create perfectly straight vertical sides along the entire 140 cm length. The structural border is then worked directly into the perimeter loops of the joined blocks in four continuous rounds, incorporating mitered corners that distribute tension evenly across all four directions. This multi-layered approach prevents sagging and ensures your table runner drapes impeccably over the edges of your dining table.
Gauge and Finished Size
Achieving correct gauge is essential for ensuring your yarn quantities match the requirements and your finished runner lays completely flat. Gauge for this pattern is measured by completing one full diamond motif through Round 8, which should measure exactly 10 cm by 10 cm (3.9 in by 3.9 in) when measured from peak to peak after light blocking. If your motif measures larger than 10 cm, your stitches are too loose; switch down to a 3.25 mm hook and re-sample. If your motif measures smaller than 10 cm, your tension is too tight; consciously relax your working grip or move up to a 3.75 mm hook.
The finished table runner measures 140 cm in length and 40 cm in width (approximately 55 inches by 15.7 inches), requiring exactly 14 full diamond blocks arranged in a 1-by-14 linear grid, edged on both long sides by the 28 half-diamond edge filler units. If you wish to customize the runner for a longer dining table or a shorter console surface, you can easily scale the length by adding or subtracting pairs of full diamond blocks in increments of 2, adjusting your total yarn yardage accordingly by approximately 100 meters per extra motif pair.
Pattern Notes
- Working in the round: Most motifs are worked in joined rounds with a slip stitch to the first stitch, unless otherwise specified in individual part instructions.
- Turning chains: Beginning chains (such as ch 3 for dc) do not count as a stitch unless explicitly stated at the beginning of the round description.
- Right side consistency: Always keep the Right Side (RS) facing you when working motif rounds, fastening off securely at the end of each color phase.
- Color changes: Fasten off cleanly after each color section, leaving a 10 cm (4 in) tail for weaving in, and join new colors in designated spaces using a standing stitch or slip stitch join.
- Stitch count verification: Always recount your stitches at the end of every round. Missing a single chain space in Round 3 will throw off the post stitch alignment in Round 6.
- Blocking preference: Wet blocking (soaking in lukewarm water with wool wash, pressing gently in a towel, and pinning out dry) is strongly recommended over steam-only blocking for mercerized cotton.
- Working into post stitches: When working behind front post stitches, ensure you do not skip the stitch directly behind the post on the following round unless instructed.
- Joining method: Motifs are joined using an invisible mattress stitch from the wrong side or a continuous join-as-you-go method during the final border round of each block.
Instructions
Part 1: The Turquoise Diamond Block Centre
Using Color A (Vibrant Turquoise) and your 3.5 mm hook, create a magic ring to form the foundation of your central diamond motif.
- Round 1: Working into the magic ring, ch 3 (does not count as st here and throughout), [3 dc, ch 2] 4 times, join with sl st to top of first dc. (12 dc, 4 ch-2 sps)
- Round 2: Sl st into the first ch-2 sp, ch 3, (2 dc, ch 2, 3 dc) in same ch-2 sp, *ch 1, skip 3 dc, (3 dc, ch 2, 3 dc) in next ch-2 sp; rep from * twice more, ch 1, join with sl st to top of first dc. (24 dc, 4 ch-1 sps, 4 ch-2 sps)
- Round 3: Sl st into next dc and into first ch-2 sp, ch 3, (2 dc, ch 2, 3 dc) in same ch-2 sp, ch 1, work 1 fptr around the middle dc of the 3-dc group 2 rows below, ch 1, *(3 dc, ch 2, 3 dc) in next ch-2 sp, ch 1, fptr around middle dc 2 rows below, ch 1; rep from * twice more, join with sl st to top of first dc. (24 dc, 4 fptr, 8 ch-1 sps, 4 ch-2 sps)
- Round 4: Sl st into next dc and into first ch-2 sp, ch 3, (2 dc, ch 2, 3 dc) in same ch-2 sp, ch 2, skip ch-1 sp, 1 fptr around fptr 2 rows below, ch 2, skip ch-1 sp, *(3 dc, ch 2, 3 dc) in next ch-2 sp, ch 2, skip ch-1 sp, fptr around fptr 2 rows below, ch 2, skip ch-1 sp; rep from * twice more, join with sl st to top of first dc. Fasten off Color A, leaving a 15 cm tail. (24 dc, 4 fptr, 8 ch-2 sps, 4 corner ch-2 sps)
Part 2: Squaring the Motif with Crisp White
Join Color B (Crisp White) with a standing dc in any corner ch-2 space from Round 4.
- Round 5: Standing dc in any corner ch-2 sp, (2 dc, ch 2, 3 dc) in same sp, [ch 2, skip 3 dc, 1 dc in next ch-2 sp, fptr around fptr 2 rows below, 1 dc in next ch-2 sp, ch 2, skip 3 dc, (3 dc, ch 2, 3 dc) in next corner ch-2 sp] 3 times, ch 2, skip 3 dc, 1 dc in next ch-2 sp, fptr around fptr 2 rows below, 1 dc in next ch-2 sp, ch 2, skip 3 dc, join with sl st to top of first dc. (36 dc, 4 fptr, 12 ch-2 sps, 4 corner ch-2 sps)
- Round 6: Sl st into next dc and into corner ch-2 sp, ch 3, (2 dc, ch 2, 3 dc) in same corner sp, [ch 1, work 3 dc in next ch-2 sp, ch 1, fptr around fptr 2 rows below, ch 1, work 3 dc in next ch-2 sp, ch 1, (3 dc, ch 2, 3 dc) in corner ch-2 sp] 3 times, ch 1, work 3 dc in next ch-2 sp, ch 1, fptr around fptr 2 rows below, ch 1, work 3 dc in next ch-2 sp, ch 1, join with sl st to top of first dc. (48 dc, 4 fptr, 16 ch-1 sps, 4 corner ch-2 sps)
- Round 7: Sl st into next dc and into corner ch-2 sp, ch 3, (2 dc, ch 2, 3 dc) in same corner sp, [ch 2, skip 3 dc, work 1 dc in each of next 3 dc, fptr around fptr 2 rows below, work 1 dc in each of next 3 dc, ch 2, skip 3 dc, (3 dc, ch 2, 3 dc) in corner ch-2 sp] 3 times, ch 2, skip 3 dc, work 1 dc in each of next 3 dc, fptr around fptr 2 rows below, work 1 dc in each of next 3 dc, ch 2, skip 3 dc, join with sl st to top of first dc. Fasten off Color B. (72 dc, 4 fptr, 8 ch-2 sps, 4 corner ch-2 sps)
Part 3: Final Diamond Boundary and Edge Fillers
Join Color C (Silver Gray) with a standing sc in any corner ch-2 space to lock the geometric angles in place.
- Round 8: Standing sc in any corner ch-2 sp, ch 2, 2 sc in same corner sp, [work 1 sc in every st and 2 sc in every ch-2 sp across to next corner, (2 sc, ch 2, 2 sc) in corner ch-2 sp] 3 times, work 1 sc in every st and 2 sc in every ch-2 sp across to beginning corner, 1 sc in starting corner sp, join with sl st to first sc. Fasten off Color C, leaving a 30 cm tail for sewing. (104 sts, 4 corner ch-2 sps)
- Edge Filler Motifs (Make 28): Working flat in rows using Color A for 2 rows, Color B for 2 rows, and Color C for 1 row, follow half-diamond shaping instructions: ch 4, work 3 dc in 4th ch from hook, turn. (3 dc, 1 ch-3 turning sp)
- Filler Round 2: Ch 3, (3 dc, ch 2, 3 dc) in first sp, ch 1, 3 dc in turning ch sp, turn. (9 dc, 1 ch-2 sp, 1 ch-1 sp)
- Filler Round 3: Ch 3, (3 dc, ch 2, 3 dc) in corner sp, ch 1, fptr around center dc 2 rows below, ch 1, 3 dc in last st, turn. (12 dc, 1 fptr, 2 ch-1 sps, 1 ch-2 sp)
- Filler Round 4: Ch 3, (3 dc, ch 2, 3 dc) in corner sp, ch 2, fptr around fptr 2 rows below, ch 2, 3 dc in last st, fasten off Color A. (12 dc, 1 fptr, 2 ch-2 sps, 1 corner ch-2 sp)
- Filler Round 5: Join Color B, work framing rows equivalent to motif Rounds 5-7 along the flat edge to create 28 half-diamond triangles. Fasten off with 30 cm tail. (38 sts per half motif)
Assembly
Lay out your 14 primary diamond blocks in a straight vertical line on a flat blocking surface, ensuring all turquoise centers point in the exact same direction. Position the 28 half-diamond edge fillers along the left and right outer sides of the main chain so that the straight edges form clean vertical lines and the diagonal slopes nestle perfectly into the side indentations of the main diamond blocks. Use your locking stitch markers every 10 centimeters to pin the units together securely before beginning the final joining process.
- Step 1: Thread your tapestry needle with a 50 cm strand of Color C (Silver Gray) yarn.
- Step 2: With the Wrong Side (WS) facing up, join motifs using an invisible mattress stitch working through the back loops only (BLO) of Round 8 boundary stitches.
- Step 3: Stitch vertically down the entire 140 cm central spine where the 14 main diamond blocks meet end-to-end, pulling stitches firm but not puckering the fabric.
- Step 4: Attach the 14 half-diamond edge fillers to the left longitudinal side, stitching motif edge to motif edge securely.
- Step 5: Repeat the mattress stitch joining process for the 14 half-diamond edge fillers along the right longitudinal side of the runner.
- Step 6: Inspect the entire joined assembly from the Right Side (RS) to ensure all diamond intersections align symmetrically without gaps or overlapping fabric folds.
- Step 7: Weave in all internal joining tails securely through the back of dense stitch clusters using your tapestry needle.
Border and Finishing
- Round 1 (Foundation Border): Join Color C (Silver Gray) with a standing sc in any top-right corner ch-2 space of the assembled runner. Work 1 sc in every stitch along the short top edge, (1 sc, ch 2, 1 sc) in corner, work evenly spaced sc along the long 140 cm side (approx. 2 sc per motif edge), (1 sc, ch 2, 1 sc) in bottom-right corner, work 1 sc across bottom short edge, (1 sc, ch 2, 1 sc) in bottom-left corner, work evenly spaced sc up long left side, (1 sc, ch 2, 1 sc) in top-left corner, join with sl st to first sc. (360 sc, 4 corner ch-2 sps)
- Round 2: Ch 3 (does not count as st), work 1 bpdc around every sc stitch around the entire perimeter, working (2 dc, ch 2, 2 dc) in each of the 4 corner ch-2 sps, join with sl st to first bpdc. (368 sts, 4 corner ch-2 sps)
- Round 3: Ch 1, 1 sc in every st around, working (1 sc, ch 2, 1 sc) in each corner ch-2 sp, join with sl st to first sc. (384 sc, 4 corner ch-2 sps)
- Round 4: Working a decorative crab stitch (reverse single crochet) from left to right, work 1 rev-sc in every stitch around the entire outer perimeter, working 3 rev-sc in each corner ch-2 sp, join with sl st, fasten off securely. (388 sts)
- Weaving Ends: Thread all remaining yarn tails through your tapestry needle and weave them invisibly through the reverse side of the Silver Gray border stitches for at least 5 cm before clipping close to the work.
- Blocking Phase: Submerge the completed turquoise diamond block crochet table runner in lukewarm water with mild wool wash for 20 minutes. Gently press out excess water in a clean white towel (never wring or twist). Pin the runner flat onto foam blocking mats, squaring off all outer corners and stretching the diamond points until the entire piece measures precisely 140 cm by 40 cm. Allow to dry completely before removing pins.
Yarn Substitution Guide
Selecting the right alternative yarn ensures your turquoise diamond block crochet table runner retains its crisp stitch definition and durability. Here are five recommended fibre and weight alternatives:
- Sport Weight Organic Bamboo Blend: Use a 3.25 mm hook; creates a softer, silkier drape with a luxurious sheen, though motifs will be slightly smaller and require an extra blocking stretch.
- Worsted Weight 100% Combed Cotton: Use a 4.0 mm hook; yields a heavier, more substantial table runner with larger motifs (approx. 12 cm each), reducing the total motif count needed to 10.
- DK Weight Linen and Cotton Blend: Use a 3.5 mm hook; provides an exquisite rustic texture and exceptional heat resistance for hot serving dishes, with a slightly stiffer organic hand.
- DK Weight Acrylic and Cotton Blend: Use a 3.5 mm hook; offers lightweight durability and machine-washable convenience, making it ideal for everyday family dining tables with easy care.
- Size 3 Crochet Cotton Thread (Double Stranded): Use a 3.5 mm hook; creates an ultra-detailed, heirloom lace effect with hyper-crisp diamond geometry, though work time will increase significantly.
Troubleshooting by Round
- Round 1 — Magic ring opening up: If the central ring expands while working Round 2, you did not secure the tail securely under the stitches; frog back to the ring, thread the tail through the first 3 dc bases, and pull tight before continuing.
- Round 3 — Missing fptr placement: If you cannot locate the target middle dc 2 rows below, you likely skipped a chain space in Round 2; count your stitches from the corner to verify placement before anchoring the post stitch.
- Round 5 — Wavy or cupping motif: If your motif begins to cup like a bowl during the Crisp White framing rounds, your tension is too tight; switch up to a 3.75 mm hook or consciously relax your yarn pull.
- Round 8 — Curling corners: If the Silver Gray boundary round curls inward at the corners, you missed a second sc inside the corner chain-2 space; add the missing stitch to flatten the corner angle immediately.
- Filler Motifs — Uneven half-diamonds: If your edge fillers do not match the height of the main blocks, ensure you are turning consistently at the end of every row and checking your turning chain counts.
- Assembly — Puckered mattress seam: If your joined motifs pull tight and create a ridge, you pulled your mattress stitch too firmly; loosen your sewing tension and ease the cotton threads across the join.
- Border Round 2 — Rippling bpdc edge: If the back post double crochet round ripples or waves, you worked too many stitches into the straight side sections; frog back and ensure a strict 1-to-1 stitch ratio.
Tips for Success
- Wind neat yarn cakes: Wind your turquoise, white, and gray cotton yarns into center-pull cakes before starting to prevent tangling during frequent color changes.
- Keep a dedicated stitch journal: Log your completed motif counts (marking off 1 to 14 for main blocks and 1 to 28 for fillers) so you never lose track during long assembly sessions.
- Block in batches: Block your 14 main diamond blocks in two batches of 7 on your foam mats to ensure even pin tension and precise 10 cm square dimensions.
- Use locking stitch markers generously: Clip markers into every corner of your motifs when arranging the runner layout to prevent accidental rotation of individual blocks.
- Maintain consistent hand tension: Cotton yarn has zero stretch forgiveness; take regular hand breaks to avoid tightening your grip mid-round, which causes uneven motif sizes.
- Weave ends as you go: Fasten off and weave in color transition tails immediately after completing each motif part rather than leaving hundreds of ends for the end of the project.
- Invest in rust-proof pins: Always use stainless steel T-pins for wet blocking cotton items to prevent unsightly rust stains from transferring onto your crisp white yarn.
- Steam lightly after final assembly: Give your completed and joined runner a final light steam pass through a pressing cloth to settle the mattress stitch seams before table display.
Common Mistakes to Avoid
- Skipping motif blocking: Assuming unblocked motifs will stretch straight during assembly leads to severe puckering and crooked table runner edges; always block first.
- Miscounting corner chain spaces: Working only 1 chain instead of 2 in motif corners collapses the geometric diamond angle, making subsequent post stitches bunch up.
- Using non-mercerized fuzzy yarn: Choosing a fuzzy wool or acrylic yarn obscures the sharp geometric lines that define the turquoise diamond block pattern; stick to mercerized cotton.
- Incorrect post stitch depth: Anchoring your fptr into the current row instead of 2 rows below flattens the texture and destroys the iconic 3D relief of the design.
- Joining on the right side: Sewing your motifs together with the Right Side facing up creates a bulky, visible ridge on the front; always assemble from the Wrong Side.
- Forgetting stitch count checks: Ignoring the end-of-round stitch totals leads to compounding errors that make squaring the motif impossible by Round 7.
Ways to Customize This Pattern
- Sunset Coral Palette: Replace Color A with vibrant coral, Color B with soft cream, and Color C with warm gold for a warm, earthy bohemian dining aesthetic.
- Midnight Ocean Theme: Substitute Color A with deep navy blue, Color B with turquoise, and Color C with pristine white for a striking coastal maritime look.
- Matching Dining Placemats: Use a single standalone diamond motif worked through Round 8 with an extended 2-round border to create a set of matching geometric table placemats.
- Cozy Bed Runner Conversion: Extend the central motif chain from 14 blocks to 30 blocks and widen the side fillers to create a breathtaking matching bed runner for a queen-size bed.
- Monochrome Elegance: Work the entire design in three shades of gray (light, medium, charcoal) for a sophisticated, modern minimalist interior decor statement.
- Festive Holiday Runner: Swap the turquoise for rich emerald green, white for snowy silver, and gray for metallic gold accents for a stunning holiday dining centerpiece.
Care and Washing
Because this turquoise diamond block crochet table runner is crafted from 100% mercerized cotton, it is durable, washable, and designed to maintain its vibrant luster over years of use. Wash your runner by hand or on a gentle machine cycle in cool water (maximum 30°C / 85°F) using a mild, pH-neutral liquid detergent formulated for fine textiles. Avoid chlorine bleach or optical brighteners, which can dull the intensity of the turquoise and gray fibers.
After washing, gently squeeze out excess moisture by rolling the runner in a clean white bath towel—never wring, twist, or tumble dry, as high heat can shrink cotton fibers and distort geometric angles. Reshape the runner while damp, pin it flat to measurements on blocking boards if necessary, and allow it to air dry completely away from direct sunlight to preserve color vibrancy.
Styling and Display Ideas
Your finished handmade turquoise diamond block crochet table runner serves as a versatile, eye-catching focal point that elevates any surface it graces. Here are five inspiring ways to style and display your piece:
- Formal Dining Centerpiece: Center the runner down a dark wood dining table, topped with a minimalist ceramic vase filled with white eucalyptus and silver candlesticks.
- Coastal Console Accent: Drape the runner across an entryway console table paired with woven baskets and ocean-themed blue glass decor for a welcoming coastal greeting.
- Spring Brunch Table: Pair the turquoise and white geometry with pastel yellow dinnerware, fresh spring tulips, and linen napkins for an uplifting seasonal tablescape.
- Modern Coffee Table Feature: Fold or center the runner across a glass or marble coffee table beneath a stack of art books and a scented soy candle.
- Photography & Sharing Tips: Photograph your runner in natural morning side-light to highlight the 3D relief of the front post stitches and sharp diamond blocks before sharing your work online.
Frequently asked questions
Can a beginner make this turquoise diamond block crochet table runner?
While the pattern is classified as intermediate due to post stitches and modular joining, an ambitious advanced-beginner with strong basic crochet skills and patience can successfully complete it by following the step-by-step instructions carefully.
How much yarn do I need for this entire project?
You will need approximately 700 meters of Color A (Turquoise), 600 meters of Color B (Crisp White), and 300 meters of Color C (Silver Gray), totaling around 1,600 meters of DK weight 100% mercerized cotton yarn.
What is the best yarn for a crochet table runner?
100% mercerized cotton is universally considered the best choice because it provides crisp stitch definition, zero fuzziness, heat resistance, durability, and a subtle sheen that elevates home decor items.
How long does it take to crochet this table runner?
For an intermediate crocheter working at a steady pace, the project typically takes between 4 to 6 weeks, amounting to approximately 35 to 45 hours of total work time split across motif making and assembly.
Can I machine wash the finished table runner?
Yes, you can machine wash it on a delicate wool or gentle cycle using cool water and mild detergent, but hand washing and flat air-drying are always recommended to preserve the crisp geometric blocking.
How do I adjust the length of the runner for a longer table?
You can easily customize the length by adding more pairs of full diamond blocks to the central chain and adjusting your edge filler counts accordingly, remembering to purchase an extra 100 meters of yarn per motif pair added.
Why are my motif corners curling during Round 5?
Curling corners usually happen when your tension is too tight or you missed the second stitch inside the corner chain-2 space; relax your grip and verify your corner stitch counts immediately.
Do I really need to block every individual motif?
Yes, individual motif blocking is non-negotiable for achieving a professional, flat, and seamless assembly; skipping this step will cause the final runner to warp and pucker along the seams.
What size crochet hook should I use?
The pattern calls for a 3.5 mm (US E/4) ergonomic crochet hook to ensure your stitches remain tight, firm, and structurally stable for home decor use.
How are the individual motifs joined together?
The motifs are joined from the Wrong Side using an invisible mattress stitch worked through the back loops only (BLO) of Round 8, followed by a robust 4-round structural outer border.
Starting rounds — magic ring and first increases